How to Adjust Vapes: Expert Guide for Perfect Hits
Ever struggled to adjust vapes properly? You’re not alone. Many vape users experience inconsistent hits, unsatisfying flavors, or harsh throat sensations because they haven’t mastered the fine art of vape adjustment.
Knowing how to adjust vapes effectively transforms your vaping experience from mediocre to exceptional. Each device comes with specific settings that control everything from vapor production to flavor intensity. Fortunately, learning these adjustments isn’t complicated once you understand the basics.
This comprehensive guide covers everything you need to know about optimizing your vape. Specifically, we’ll walk through power settings, airflow control, flavor customization, and maintenance practices that ensure perfect hits every time. Whether you’re using a simple pod system or an advanced mod, these expert techniques will help you achieve your ideal vaping experience.
Understanding Vape Adjustment Basics
The ability to customize your vaping experience sets modern vapes apart from traditional smoking methods. When we talk about adjusting vapes, we’re referring to the process of fine-tuning various parameters to create your ideal experience. Let’s explore what this means in practice.
What does ‘adjusting a vape’ mean?
Adjusting a vape involves modifying different settings to personalize your vaping experience according to your preferences. Modern vape devices offer various customization options that affect how your device performs. The most common adjustments include:
Airflow control: Determines how much air mixes with the vapor, affecting both flavor intensity and cloud size
Power settings: Includes wattage and voltage adjustments that control heating element temperature
Cooling intensity: Some newer models offer multi-level cooling controls
Flavor enhancements: Advanced devices may allow sweetness, sourness, or aroma concentration adjustments
Each of these parameters directly impacts your vaping experience. For instance, airflow adjustment ensures that coil temperature remains within the optimal range, preserving e-liquid flavor while preventing dry burning for a better experience
1. Similarly, wattage determines how much power your vape uses to convert liquid to vapor, making it a key factor in how your device performs 2.
Types of vapes that allow adjustments
Not all vape devices offer the same level of customization. Here’s a breakdown of common device types and their adjustment capabilities:
Box mods are larger devices designed for experienced vapers, offering advanced features including adjustable wattage and temperature control. They provide the highest level of customization and performance 3. These devices typically allow users to adjust settings between 50-200 watts or more depending on the model 2.
Pod systems with adjustable airflow give users the flexibility to modify airflow to match preferences—whether you want a tight draw for intense flavor or a loose draw for bigger clouds 4. Many modern pod devices include user-friendly designs allowing adjustments on-the-go.
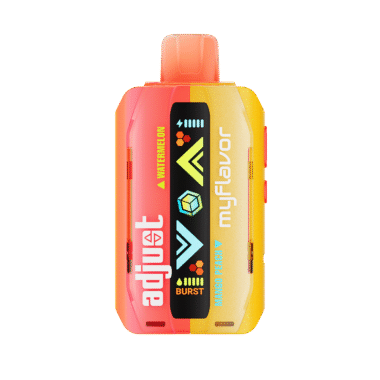
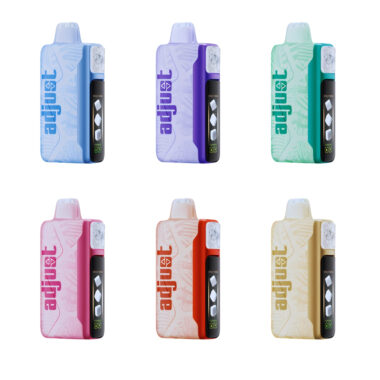
Adjustable disposable vapes represent the latest innovation, offering customization previously unavailable in disposables. These devices feature adjustable cooling, sweetness control, and even aroma concentration optimization for an unprecedented level of personalization 5.
Why adjustments matter for performance
Proper adjustment significantly enhances your vaping experience in multiple ways. First, adjusting airflow directly affects three core elements of vaping: throat hit intensity, vapor density, and flavor clarity 1. Tighter airflow produces less vapor but delivers a stronger throat hit and more concentrated flavor, mimicking traditional smoking. Conversely, wider airflow yields larger clouds and cooler vapor with somewhat diluted flavor.
Moreover, power settings dramatically impact both vapor production and flavor extraction. Finding the right wattage “sweet spot” is crucial for keeping flavors crisp and delicious 6. Too low a setting results in weak vapor and muted flavor, while too high can cause burnt hits and damaged coils.
Furthermore, the adjustment capabilities allow you to match settings to specific e-liquids. High-VG (vegetable glycerin) e-liquids typically require more power to vaporize effectively, while high-PG (propylene glycol) liquids may perform well at lower wattages 7.
Additionally, these customizations help preserve coil life and prevent overheating. When insufficient airflow causes the coil to overheat, it results in a burnt taste 1. Likewise, using wattages outside the recommended range for your specific coil can lead to premature failure.
Ultimately, mastering vape adjustments transforms an ordinary vaping session into a tailored experience that perfectly matches your preferences, making it well worth the small learning curve.
How to Adjust Power and Airflow Settings
Properly adjusting your vape’s power and airflow settings creates the foundation for an exceptional vaping experience. These two elements work together to determine everything from vapor temperature to flavor intensity.
Finding the power mode switch
Most modern vape devices offer various power adjustment options controlled through a dedicated interface. Initially, locate your device’s control panel, which typically features a small screen with adjustment buttons. On box mods, you’ll usually find a fire button accompanied by up/down buttons for adjusting wattage. On simpler pod systems, look for a single button that cycles through preset power levels when pressed multiple times.
To access different power modes:
Press the fire button 3-5 times rapidly to turn on your device
Click the menu or mode button (often the fire button pressed 3 times when already on)
Cycle through available modes using the adjustment buttons
Confirm your selection by pressing the fire button or waiting a few seconds
Temperature control works by monitoring the coil’s resistance in real time. As the coil heats up, its resistance changes, and the device adjusts power output to maintain steady temperature, preventing overheating and avoiding burnt flavors.
Understanding MTL vs DTL airflow
MTL (Mouth-to-Lung) and DTL (Direct-to-Lung) represent two distinct vaping styles requiring different airflow settings.
MTL vaping mimics traditional cigarette smoking. When using this technique, you first draw vapor into your mouth before inhaling it into your lungs. MTL vaping demands restricted airflow with tighter draws and typically employs:
Higher resistance coils (above 1.0 ohm)
Narrower airflow holes (up to 1mm in diameter)
Thinner mouthpieces similar to cigarette filters
Higher nicotine strengths for a satisfying throat hit
DTL vaping involves inhaling vapor directly into your lungs in one continuous breath. This technique requires:
More open airflow systems
Larger airflow holes (2mm+ diameter)
Wider-bore mouthpieces
Lower resistance coils (sub-ohm)
Higher wattage settings
RDL (Restricted Direct-to-Lung) represents a middle ground between these styles, offering a slightly restricted direct lung inhale with medium airflow and balanced flavor/vapor production.
Matching power with airflow for smoother hits
The relationship between power and airflow is crucial for achieving smooth, satisfying hits. Essentially, higher power settings require more airflow to prevent overheating, while restricted airflow works better with lower power.
For low-resistance coils (sub-ohm), open your airflow control fully so ambient air can adequately cool the coil and maintain e-liquid saturation. These coils produce large amounts of vapor quickly, and insufficient airflow can cause temperature spikes resulting in dry hits.
For high-resistance coils, start with the airflow ring at its narrowest setting that still allows comfortable puffing. Since these coils heat more slowly, they require less airflow to maintain stable temperature.
The ideal settings also depend on your e-liquid composition:
High-VG juices are thicker and need ample airflow to prevent wicking problems
High-PG liquids work well with moderate airflow restriction (25-50% closed) to enhance flavor
For balanced VG/PG ratios, start with airflow at 50-75% open for satisfactory vapor density and flavor strength
Remember that adjusting your vape is about personal preference. Most vapers find their sweet spot through experimentation, starting with manufacturer recommendations and fine-tuning from there.
Customizing Flavor and Cooling Levels
Modern vape technology has evolved far beyond simple power settings. Today’s advanced devices offer unprecedented control over flavor profiles and cooling sensations, letting you customize nearly every aspect of your vaping experience.
Using ice level buttons effectively
Many contemporary vapes feature dedicated ice level controls that regulate cooling intensity. The OXBAR ICE-NIC, for instance, includes a side button specifically designed for adjusting cooling effects through three distinct levels: low, medium, and high 8. To modify these settings, simply press the button once to activate the screen, then press again to toggle through the available options.
First and foremost, understand that even when set to “off,” most devices still deliver a slight cooling sensation since many disposable flavors contain some cooling elements 8. At maximum settings, however, the difference becomes quite noticeable—delivering what some manufacturers describe as an “Arctic blast” of coolness 9.
Notably, when experimenting with ice levels:
Start with lower settings if you’re sensitive to menthol
Medium and high settings offer progressively stronger cooling sensations
Different flavors respond differently to cooling adjustments
Some users prefer zero ice for fruit flavors but high cooling for mint varieties
Adjusting sweetness and sourness (if available)
Beyond cooling controls, certain advanced vapes now offer sweetness and sourness adjustments. The Adjust MySour 40K, for example, features four distinct sourness levels that can be modified by pressing a button until you reach your preferred intensity 10.
Interestingly, adjusting sourness often affects more than just flavor. In fact, increasing sourness on the MySour 40K actually increases power output, enhancing vapor production, warmth, and flavor saturation 10. If you find vapor quality too faint at lower settings, simply increasing the sourness level can boost overall performance.
In contrast, the Adjust MySweet 40K provides four sweetness levels ranging from “Sweet Whisper” (Level 0) to “Sweet Hunger” (Level 3) 11. This customization allows you to fine-tune sweetness based on your mood or preference throughout the day.
How flavor settings affect throat hit
The relationship between flavor settings and throat hit is particularly significant. When you adjust cooling levels, you’re directly influencing how intense the throat sensation feels. Higher ice settings typically deliver a sharper, more pronounced throat hit that some users find refreshing while others consider overwhelming.
Coupled with this, sourness adjustments on devices like the MySour 40K intensify not just flavor but also the overall hit—including warmth and vapor density 10. This means that increasing sourness levels can provide a stronger throat sensation similar to increasing power settings.
Additionally, nicotine control features (found on some adjustable vapes) can modify throat hit intensity, though the effect may be subtle. On the OXBAR ICE-NIC, for instance, changing nicotine levels from low to high produces minimal difference in immediate throat hit 12, though extended use at higher settings does eventually yield noticeable effects, particularly when vaping first thing in the morning 12.
Understanding these relationships helps you dial in the perfect combination of flavor intensity and throat sensation for your ideal vaping experience.
Monitoring Battery and E-liquid Levels
Keeping track of your vape’s battery and e-liquid levels ensures consistent performance and prevents unpleasant experiences. Proper monitoring extends device lifespan and enhances your overall vaping satisfaction.
Reading the screen indicators
Most modern vapes feature screens displaying crucial information about your device status. Battery indicators typically appear as a battery symbol that fills with color, showing remaining charge. Some advanced models even display precise percentage readings for more accurate tracking 13.
Many devices use color coding to indicate battery status:
Green typically indicates full charge
Yellow or amber signals medium charge
Red warns of critically low battery 14
On devices with e-liquid monitoring capabilities, clear viewing windows allow you to check juice levels visually 15. Some advanced vapes display digital e-liquid level indicators alongside battery status, helping you avoid unexpected dry hits.
When to recharge your vape
First and foremost, watch for these warning signs that your vape needs recharging:
Reduced vapor production
Weaker or nonexistent throat hit
Fading flavor intensity
Dimming LED lights
Difficulty drawing air
Blinking indicator lights 16
For optimal performance, maintain your battery charge above 50%, as many devices cannot deliver their set wattage once battery levels drop below this threshold 13. Charging too often can also affect battery lifespan—a normal charging frequency is approximately once per day 17.
How to avoid dry hits from low e-liquid
Dry hits occur when there’s insufficient e-liquid to saturate the wick in your atomizer coil, resulting in that unmistakable burnt taste 15. To prevent this unpleasant experience, allow your device to rest between puff sessions—about a minute between intense vaping can help your wick properly absorb e-liquid 18.
For nearly empty tanks, try tilting or repositioning your device to help distribute remaining e-liquid toward the wick 18. Additionally, consider adjusting your VG/PG ratio if experiencing frequent dry hits—high-VG e-liquids are thicker and may take longer to absorb 19.
Undoubtedly, watching for gurgling sounds or experiencing weaker flavor can serve as early warnings that your e-liquid is running low 20. Taking action promptly when these signs appear will help you maintain consistent, satisfying hits from your properly adjusted vape.
Tips for Getting the Perfect Hit Every Time
Finding your perfect vape hit requires both patience and methodical experimentation. The right approach can transform your vaping experience from ordinary to extraordinary.
Start low and increase gradually
First and foremost, begin at the lower end of your device’s recommended wattage range rather than immediately cranking it up. This cautious approach prevents burning the coil or e-liquid while allowing you to find your sweet spot. For most vapers, the ideal range falls between 40-50 watts, where flavor nuances become noticeable 21. Consequently, increase power in small increments (3-5 watts) until you reach satisfying vapor production and flavor intensity.
Temperature plays a crucial role as different compounds vaporize at different temperatures. Low temperatures (325-350°F) release delicate terpenes for smoother, more flavorful vapor, whereas higher temperatures (375-430°F) provide more potent but potentially harsher hits 22.
Pairing flavors with power modes
Different e-liquid flavors perform optimally at specific power settings. Above all, fruity flavors typically shine at slightly lower temperatures, whereas dessert flavors often require higher heat to fully develop their profile 23. High-VG e-liquids need more power to vaporize effectively due to their thickness, yet high-PG liquids perform well at lower wattages 24.
At the same time, your inhalation technique affects flavor extraction. For smoother hits, the mouth-to-lung (MTL) method works best – take a slow draw into your mouth, hold briefly, then inhale into your lungs and exhale slowly 25.
Avoiding common mistakes like overcooling
A common error among vapers involves taking rapid, forceful inhalations, resulting in hot, harsh vapor. Instead, draw slowly and gently to allow vapor cooling as it travels through the path 22. In addition to this, avoid chain vaping – space out your draws to let your device settle and resoak the coil between hits 26.
To prevent overheating, monitor your wattage carefully and allow cool-down time between puffs. Each puff should not exceed 2 seconds, with approximately 20 seconds between puffs 27.
Conclusion
Mastering vape adjustments transforms an ordinary vaping session into a tailored experience that matches your unique preferences. Throughout this guide, we’ve explored how power settings, airflow control, and flavor customization work together to create your ideal hit. Additionally, proper battery and e-liquid monitoring ensures consistent performance while preventing those dreaded dry hits.
Remember that finding your perfect vape settings requires patience and experimentation. Start with lower wattage settings, then gradually increase until you discover your sweet spot. Similarly, adjust your airflow based on whether you prefer MTL or DTL vaping styles. After all, what works perfectly for one vaper might feel completely wrong for another.
The relationship between different adjustment factors cannot be overstated. For instance, higher power settings generally require more airflow to prevent overheating, while specific e-liquid compositions perform better with certain power and airflow combinations. Therefore, take time to understand how these elements interact for your specific device and preferred e-liquids.
Although advanced vapes offer impressive customization options, even simple devices allow meaningful adjustments that significantly enhance your experience. Whether you’re using a sophisticated box mod or an adjustable disposable, the principles outlined in this guide apply universally.
Finally, avoid common mistakes like chain vaping, taking overly forceful draws, or neglecting battery levels. Instead, space out your puffs, draw slowly and steadily, and keep your device properly charged. Consequently, you’ll enjoy smoother hits, better flavor, and longer-lasting equipment. With these adjustment techniques now at your fingertips, your days of inconsistent or unsatisfying vaping experiences are undoubtedly behind you.